Read How To Tune
Factors that affect tuning:
A wooden instrument is very sensitive to humidity and temperature changes. A violin’s pitch may rise and fall depending on the current weather. The instrument’s wood structure is vulnerable to moisture and temperature absorption, which at times can cause the wood’s cellular structure to distort (expand/contract), resulting in an “out of tune” instrument.
Pegs, strings and the bow are also affected by temperature and humidity. Therefore, it is a good idea to store the violin and bow in the case and to use a dampit or humidifier to regulate moisture in the case. In the event that practice is an issue and the instrument is stored on an instrument stand or hanger all week, take special care to check daily the humidity and temperature in the room where the instrument is kept. A dampit comes with an indicator to put on the wall.
Make it a common practice to never expose the instrument to extreme conditions. If the weather is extreme (hot/cold) and you must travel 15 minutes or more to your lesson, try to arrive 10 to 15 minutes early so that the instrument has a chance to adjust to the environment in the case before taking it out and trying to tune it.
How to inspect the instrument before tuning:
 |
 |
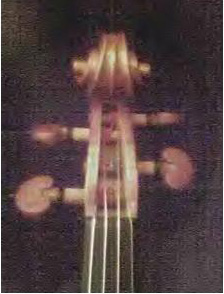 |
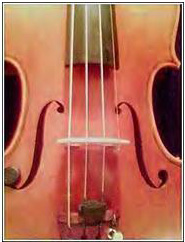
Before tuning, look at the instrument and inspect for loosely wound strings, fraying strings, and an uneven, warped or displaced bridge. If any of these items are noticeable, please do the following:
Loose strings: gently and VERY slowly, while following the current wind pattern of the string, turn the peg, which employs the loose string, clockwise while simultaneously pushing the peg inward towards the peg box. Turn just enough so that the string is no longer visibly loose.
Fraying Strings: You will need to replace whichever string is fraying for this signifies wear, and the potential to break immediately upon commencement of tuning.
Uneven or Warped Bridge: This should be inspected and/or replaced by a luthier.
Displaced Bridge: While the instrument is on your lap with the scroll facing farthest away from you, pinch the bridge with the thumbs, index fingers and middle fingers of both hands near the feet. Gently shift the bridge to the left or to the right so that it is properly aligned with the fingerboard and the feet are aligned with the notches of the F holes.
Once these items are in place, you can begin the tuning process. The violin is tuned to the concert pitch A440, which is the A above middle C vibrating at 440 cycles per second. I have my beginning students consciously listen to an a440.mp3 on their Suzuki CD and match the pitch with their voices. I also have them associate the pitch with something like a color, a sound, a feeling—so that when it’s time to recall the pitch without hearing a reference, they can do so. This takes practice, but again, it is refining their ear and “opening” it up to be able to hear tone “colors.” This skill is essential for intonation on fretless and non-tempered instruments such as the violin.
Until the student/parent is able to hear A440 without a reference pitch, one of the tuning devices mentioned above may be used to produce the pitch.
How to tune the instrument:
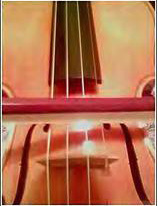
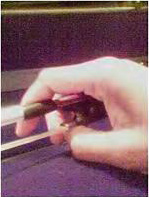
- With the instrument on the lap and the scroll facing away from you, gently place your fingers of your right hand around the frog of the bow (you do not have to have a correct bow hold to do this)
- Then place the bow with the hairs flat on the A string (the 2nd string from the right) between the bridge and the fingerboard.
- Gently, slowly & steadily drag or pull the bow in a straight line across the A string while keeping the fingers loosely on the bow.
- If the instrument is out of tune, you will hear the A string playing as well as the reference A.
The goal is to match the A string to the reference so that you only hear one pitch.
If the string is out of tune, you will hear a “fighting” or a “clashing” pulsating sound. This means the two sound waves are out of “sync” or out of phase with one another.
When the waves are aligned or in sync, the volume of the singular pitch A will seem to almost suddenly increase, producing one full resonant pitch.
Therefore, when it seems like you only hear the reference tone, the A is in tune.
Tuning with the bow:
Now, here comes the fun part—playing two strings at a time and listening for the differential tone[1]. It’s not that hard.
Here, we’ll use the interval (space between two notes) of a perfect 5th. In other words, the distance between the D and the A string is 5 notes, between the A and E is 5 notes, and there are also 5 notes between the G and D.
This interval of a 5th is called perfect because it posses a purity that distinguishes it from all other intervals. When tuning the instrument to this interval, you will hear the purity come alive when the instrument is in tune.
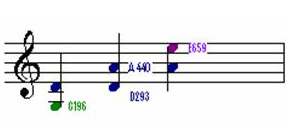
- While resting the bow on both the A and the D string (one string to the left of the A), pull the bow in the same manner as you did to tune the A:
- Listen for a pulsating sound “wa wa wa wa wa wa wa wa” and listen for the speed of that sound.
- If the speed seems rather slow and the “wiggles” as I like to call them seem to be wide and far apart, then the D string is too low or flat. Overall, it sounds kind of droopy, warped or sad.
- To fix this, while still pulling the bow across the string, turn the D fine tuner clockwise and listen for the change in the “wiggles”.
- As the D approaches the correct pitch the wiggles will become smaller and closer together until they disappear.
- Once they disappear, the sound will swell in volume and produce a still, pure and clear tone, one that I like to call “the sunshine sound.”
- A differential tone will be produced, which will sound like a 3rd note on the bottom sounding ever so quietly.
- If the initial pulsating sound is very tight and fast, then more than likely, the D string is sharp or too high.
- Continue bowing while turning the fine tuners counter clockwise to lower the pitch until you reach the stillness of the “sunny day.”
- Repeat the same procedure with the D and G string and then proceed to the A and E string together. Check the A string again to make sure it didn’t go slightly out of tune.
- The A string may have gone out of tune since changing the tension of the other strings causes the bridge to shift slightly.
- Repeat the total process as many times as necessary until the instrument’s intonation is completely balanced.
- If not severely out of tune, it shouldn’t take more than 3 times.
What to do if the instrument is severely out of tune:
When the instrument is severely out of tune, you’ll want to gently and slowly turn the peg in the proper direction until it is relatively close to the correct pitch (clockwise if too low, counter clockwise if too high) again being very careful not to turn the peg too fast or too far. This will cause the string to break.
Also remember to push the peg into the peg box while turning the pegs. Never twist the peg and then jam it into the peg box. This could damage the peg holes and cause improper wear on the peg.
More often, when the instrument is severely out of tune, a string or 2 may be really flat. So, you’ll want to tighten the corresponding peg but again not too far.
Very rarely is the instrument severely out of tune and sharp. When this happens it’s usually because the instrument was accidentally “bumped” and the bridge shifted noticeably to the left or to the right. This will clearly be visible when you inspect the instrument before attempting to tune.
Ideally, the student should strive to tune the instrument in perfect fifths, with the bow, on the shoulder using the pegs. That will come with time and much practice.
In the meantime, if the above seems too complicated or difficult and you want something more simple, you’ll need to do the same mechanical processes of turning pegs, and fine tuning, but you may be able to work better using a chromatic tuner and plucking the string.
Again this item can be purchased from a music store or an online retailer. The chromatic tuner usually has light-emitting diodes (LED’s) and/or a digital needle display that indicates whether the pitch is in tune or whether it’s sharp or flat. This way, you can see visually what’s correct instead of relying on an ear that hasn’t been trained yet.
I discourage the use of the tuner by the student. The student should still listen to what’s happening while the tuning is taking place, paying very close attention to what the correct pitch sounds like. Listening like this is embedding those pitches into their musical memory and is helping to reinforce their sensitivity to intonation—again an imperative skill to possess as a string player.
[1] When two loud notes are played, another, lower, note may sometimes be heard which corresponds to the difference in vibration between the original 2 notes.
-Kennedy, Michael: Oxford Concise Dictionary of Music
